Entradas

TICKLE ROBOT

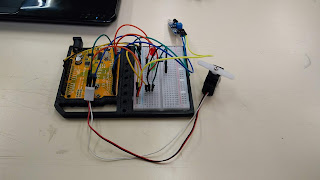
FUNCIONAMIENTO Al tocar el corazón del robot que está recubierto de aluminio, actúa como un sensor e inicia el funcionamiento del motor y se mueven las piernas y los brazos. CÓDIGO #include <SPI.h> #include <SD.h> #include <EducationShield.h> //Necessary to include Servo.h when using Servo #include <Servo.h> //Necessary to include CapacitiveSensor.h when using capacitive sensor #include <CapacitiveSensor.h> //Declare the servo for controlling the string robot Servo pull; //Declare the capacitive sensor CapacitiveSwitch sensor=CapacitiveSwitch(2,3); void setup(){   //initialize the capacitive sensor. Threshold is 400   //See the example CapacitiveSwitchTest in the Help folder   //to find the right thresshold   sensor.config(2000);   //initialize the servo motor   pull.attach(9); } void loop(){   if(sensor.getState()){ //If the capacitive sensor is touched, pull the strings     pull.write(0);   }else{ //Otherwise, loosen t

Video servo motor con leds

Video servo motor con sensor

MOTOR ARDUINO ACCIONADO CON SENSOR

Imagen
FUNCIONAMIENTO Al acercar un objeto al sensor, el motor gira 90º y se enciende el led verde (la valla se abre). Cuando se vuelve a acercar, el motor vuelve a los 0º y se enciende el led rojo (la valla se cierra). CÓDIGO #include <Servo.h> Servo myservo; const int sensorPin = 5; const int ledPin =  13;   //verde const int ledPin2 =  12;   //rojo void setup() {   myservo.attach(9);   pinMode(ledPin, OUTPUT);   pinMode(ledPin2, OUTPUT);   pinMode(sensorPin , INPUT); } void loop() {   int value = 0;   value = digitalRead(sensorPin );   if (value == HIGH) {     digitalWrite(ledPin, HIGH);     digitalWrite(ledPin2, LOW);     myservo.write(90);   delay(50);   }   if (value == LOW) {     digitalWrite (ledPin2, HIGH);     digitalWrite (ledPin, LOW);     myservo.write (0);     delay (2000);   }   } IMAGEN DE FUNCIONAMIENTO

Arduino servo motor con sensor

#include <Servo.h> Servo myservo; int buttonPin = 4; int buttonState = 0; int ledrojo = 3; int ledazul = 5; int sensorState = 0; int sensorPin = 7;  void setup() {   myservo.attach(2);   pinMode(sensorPin, INPUT); }  void loop() {    sensorState = digitalRead(sensorPin);   if (sensorState == HIGH){   myservo.write (90);   delay(1000);   digitalWrite(ledrojo,HIGH);   digitalWrite (ledazul, LOW);  }   else{ (sensorState == LOW);     myservo.write (0);     delay(1000);     digitalWrite (ledazul,HIGH);     digitalWrite(ledrojo, LOW);   }  }

Servomotor con leds ARDUINO

MOTOR QUE GIRA 90º Y SE ECIENDEN LED VERDE Y ROJO

FUNCIONAMIENTO Al pulsar pulsar el interruptor de la placa el motor gira 90º y se enciende el led verde (la valla se abre). Cuando se pulsa otra vez, el motor vuelve a los 0º y se enciende el led rojo (la valla se cierra). CÓDIGO #include <Servo.h> Servo myservo; const int buttonPin = 2;   const int ledPin =  13;   //verde const int ledPin2 =  12;   //rojo int buttonState = 0; void setup() {   myservo.attach(9);   pinMode(ledPin, OUTPUT);   pinMode(ledPin2, OUTPUT);   pinMode(buttonPin, INPUT); } void loop() {   buttonState = digitalRead(buttonPin);   if (buttonState == HIGH) {     digitalWrite(ledPin, HIGH);     digitalWrite(ledPin2, LOW);     myservo.write(90);   delay(100);   }     if (buttonState == LOW) {     digitalWrite (ledPin2, HIGH);     digitalWrite (ledPin, LOW);     myservo.write (0);     delay (1000);   }     } VÍDEO DE FUNCIONAMIENTO